Docx
table of contents
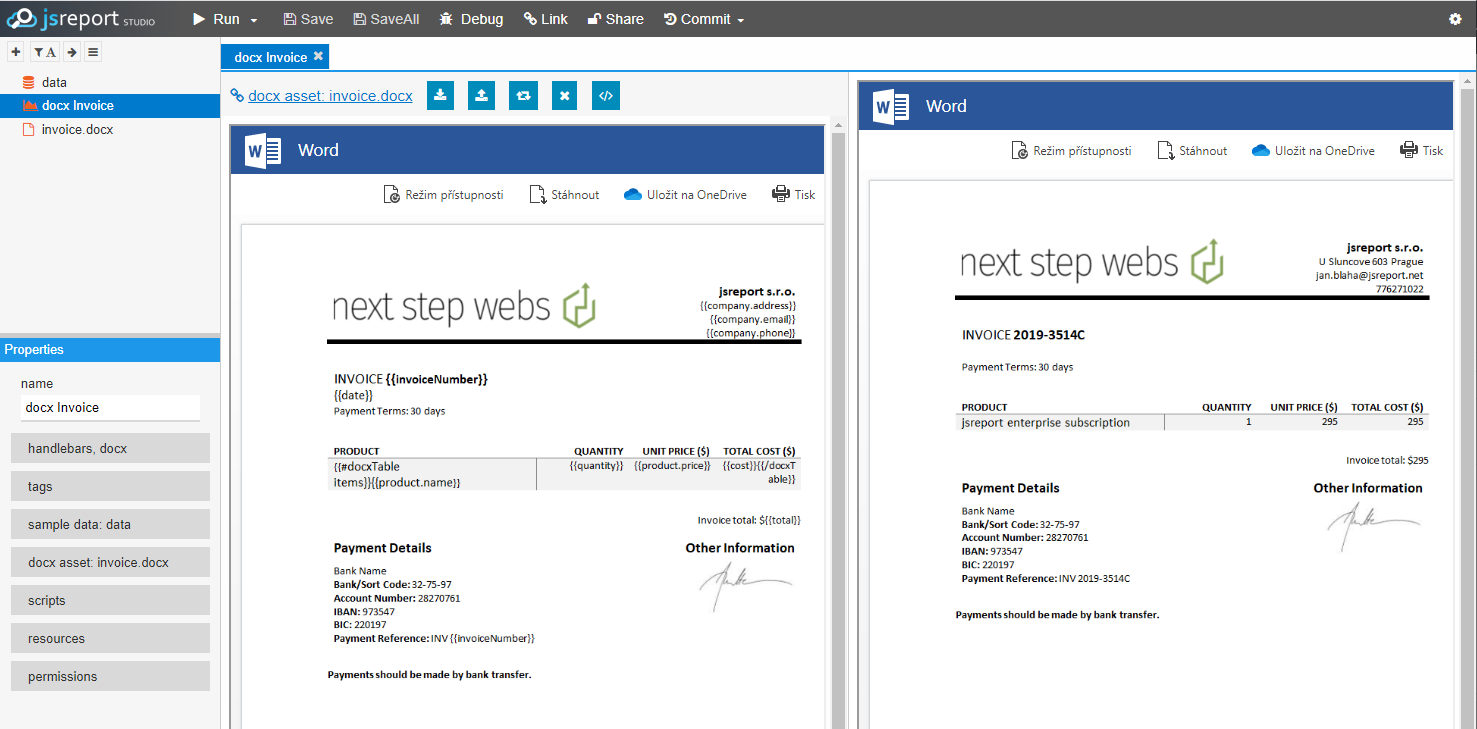
docx recipe generates office docx reports based on the uploaded docx template with handlebars tags filled inside using Word application.
- Open Word and create docx file using handlebars templating engine.
- Upload created docx file as an asset to the jsreport studio
- Create template, select docx recipe and link the previously uploaded asset
- Attach sample input data or scripts if needed
- Run the template, you get back dynamically assembled docx report
Considerations
If you use these special characters (", ', <, >, &) directly in your document and you plan to use them as part of some parameter
for a handlebars helper, please be aware that what you may receive in the handlebars helper as parameter may be the xml/html encoded version of the character.
example:
somewhere in your .docx file
data
{
    "data": "Day & Night"
}
helpers
function isEqual (a, b) {
    // what you may receive in "b" parameter may be an xml/html escaped
    // version of the string "Day & Night" which is "Day & Night".
    // so the logic bellow will return false if you don't unescape the
    // value. please always ensure to unescape a literal value you pass
    // from the document
    return a === b
}
Examples
Built-in helpers
docxList
Create a list with single item using Word and call the docxList helper. It will iterate over provided data and create another list item for every entry.
- {{#docxList people}}{{name}}{{/docxList}}
docxTable
Create a table with columns header and single row using Word. Call {{#docxTable}} in the first cell of the data row and end the call {{/docxTable}} at the last cell.
| columnA | columnB |
|---|---|
| --- | --- |
| {{#docxTable people}}{{name}} | {{email}}{{/docxTable}} |
Vertical table
Use helper argument vertical=true for rendering vertical table
| name | {{#docxTable people vertical=true}}{{name}} | |
| {{email}}{{/docxTable}} |
Dynamic columns
The table can be fully dynamic and even nested. Use rows=[[]] and columns=[] helper arguments to render dynamic columns.
| {{docxTable rows=rowsItems columns=columnsItems}} |
Merged cells can be generated by passing object to rows=[[]] and columns=[] arguments. For example using this
{
    "rows": [
        [{ rowspan: 2, value: 'R2-1' }, 'R2-2', 'R2-3', { rowspan: 2, value: 'R2-4' }],
        [null, 'R3-2', 'R3-3', null],
        ['R4-1', 'R4-2', 'R4-3', 'R4-4'],
        ['R5-1', { colspan: 2, value: 'R5-2' }, 'R5-4']
    ],
    "columns": ['R1-1', 'R1-2', 'R1-3', 'R1-4']
}
will generate following table:
| R1-1 | R1-2 | R1-3 | R1-4 |
|---|---|---|---|
| R2-1 | R2-2 | R2-3 | R2-4 |
| R3-2 | R3-3 | ||
| R4-1 | R4-2 | R4-3 | R4-4 |
| R5-1 | R5-2 | R5-4 | |
It is important to note that the columns and rows array should produce same shape of cells, it means that when you use object with rowspan you have to pass null when a cell needs to be ignored as result of the rowspan layout.
The docxTable helper call provides also @rowIndex and @columnIndex variables, which can be used to generate dynamic content based on conditions using those values.
{{#docxTable rows=rowsItems columns=columnsItems}}
{{@rowIndex}}-{{@columnIndex}}
{{/docxTable}}
Custom col width
You can pass the helper argument colsWidth, which expects an array, to customize the col widths in the table. the value passed should be an array of width values in either px or cm. example: ["500px"], if you dont want to specify a specific column just pass null [null, "500px"].
docxStyle
Wrap block with {{#docxStyle}}{{/docxStyle}} and pass textColor or backgroundColor parameter to dynamically specify text or background color.
{{#docxStyle textColor='0000FF'}}Simple text{{/docxStyle}}
Supported attributes:
- backgroundColor
- textColor
Additionally, the helper supports specifying a target attribute, the possible values are: text, paragraph, shape, cell, row.
This value allows customizing the level where the styles (textColor, backgroundColor) are going to be applied.
By default if not specified, the styles are applied to the text directly.
docxImage
- Prepare image placeholder using word - place any image to the desired position and format it to your needs.
- Select image, select Word tab "Insert", click on "Bookmark and create one
- Right click image and click "Hyperlink"
- Click bookmark and select previously created bookmark
- Click ScreenTip still on the "Insert Hyperlink" modal.
- Fill the docxImage helper call
{{docxImage src=myDataURIForImage}} - Hit ok and close the hyperlink dialog. Now if you hower the image you should see the
docxImagehelper call - Run the template with
myDataURIForImageprop in the input data and you should see the image replaced in the output.
Each image generated by docxImage generates a bookmark that points to the new image, customizing the bookmark (with bookmarkName option) will allow for other images to be able to create hyperlinks that target this specific image (just make sure to make the hyperlink of an image dynamic too with handlebars, the requirement is that the target resolves to #bookmarkName). using these two features, the custom bookmark name and the dynamic hyperlink target will allow to achieve dynamic linking between images in the document.
docxImage supports the following configuration properties:
src(string|function) -> specifies the base64 dataURI string representation of the image to load or an url from which to fetch the image. When set to a function, this function will be used to load the content of the image, allowing to fetch the image using a custom implementation.usePlaceholderSize(boolean) -> when true the dimensions of the image will be set to the same dimensions than the placeholder image defined on the docx file. Ex:{{docxImage src=src usePlaceholderSize=true}}width(string) -> specifies the width of the image, value can be inpxorcm. when onlywidthis set, theheightwill be automatically generated based on the aspect ratio of the image. Ex:{{docxImage src=src width="150px"}}height(string) -> specifies the height of the image, value can be inpxorcm. when onlyheightis set, thewidthwill be automatically generated based on the aspect ratio of the image. Ex:{{docxImage src=src height="100px"}}fallbackSrc|function(string) -> specifies the base64 dataURI string representation of the image to load or an url from which to fetch the image to use as fallback in case thesrcimage fails to load. Ex:{{docxImage src=src fallbackSrc=fallbackSrc}}. When set to a function, this function will be used to load the content of the image, allowing to fetch the image using a custom implementation.failurePlaceholderAction(string) -> specifies the action to take in case thesrc, orfallbackSrcimage fails to load. Possible values are:remove(remove the placeholder image from the document),preserve(preserve the original placeholder image). Ex:{{docxImage src=src failurePlaceholderAction="remove"}}bookmarkName(string) -> allows customizing the bookmark name of the image, this can be used to be able to reference this bookmark/image from somewhere else in the document, like when using image hyperlinks. Ex:{{docxImage src=src bookmarkName="myCustomBookmark"}}or{{docxImage src=src bookmarkName=bookmarkName}}
Loading images using a custom loader
You can set src, fallbackSrc to use a loader function. This will allow to have more control about how an image is fetched, letting implement custom logic to load images.
First the docxImage call needs to be updated to use a helper for the src: {{docxImage src=(imageLoader imageInput)}}
then you need to add the function in your helpers. The helper function needs to return another function which will run when the time to fetch the image comes.
The child function should return an object with the information of the image. it should have a type (to indicate if the image is png, jpg, etc) and a stream (a readable stream that represents the content of the image).
A basic loader function will look like this:
function imageLoader(src) {
    // a loader should always return a stream and type (extension or content type for image)
    return async function loader () {
        const fs = require('fs')

        // the idea here is that user can load the image from anywhere, user can use
        // a custom http request library, load from fs or from S3, etc. the user is also
        // in control of the input, you can pass to the helper a path to a local file if it is
        // what the loader needs for its logic.
        // the idea of allowing this is that user can still benefit from our
        // parallel limits and logic of batching images on disk to prevent
        // loading all images on memory and failing to render when using a lot of images
        return new Promise((resolve) => resolve({
            type: '${format}',
            stream: fs.createReadStream(src)
        }))
    }
}
docxObject
Allows referencing a child docx into the caller docx template.
docxObject supports the following configuration properties:
object(object) required -> specifies the information about the object to reference/embedobject.content(object) required -> specifies the information about the content to reference/embedobject.content.buffer(buffer|typed array) required -> specifies the content as binary dataobject.content.fileType(string) required -> the type of the content being referenced, possible values are:docx.object.preview(object) -> specifies the information about the preview to show in the caller docx template.object.preview.buffer(buffer|type array) -> specifies the content of the preview as binary dataobject.preview.fileType(string) -> the type of the preview content, possible values are:png,jpg,jpeg.object.preview.size(object) -> specifies the size of the preview in the caller docx template.object.preview.size.width(string|number) -> specifies the width of the preview in the caller docx template. ex:60object.preview.size.height(string|number) -> specifies the height of the preview in the caller docx template. ex:60
You can specify these options by using helper call in combination with a helper:
in helpers:
const jsreport = require('jsreport-proxy')

async function getExternalFile () {
    const externalDocx = await jsreport.assets.read('./sample2.docx', 'buffer')
    const preview = await jsreport.assets.read('docx_icon.png', 'buffer')

    return {
        content: {
            buffer: externalDocx,
            fileType: 'docx'
        },
        preview: {
            buffer: preview,
            fileType: 'png',
            size: {
                width: 60,
                height: 60
            }
        }
    }
}
docxChild
Allows embedding text from a child docx template (stored as an asset in jsreport or inline) into the caller docx template.
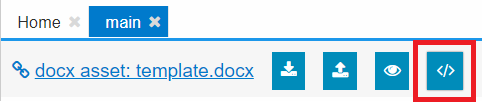
Assuming you have a docx asset "template.docx" stored in jsreport, you can call the child template this way in you main docx template:
this call will then be replaced by the text nodes and images found in the "template.docx" document.
You can also specific the docx template inline (this allows specifying the docx template in a dynamic way), by passing an object to the helper:
you will need to have a helper that returns the following object:
{
    content: "<string content here>",
    encoding: "base64"
}
for example, according to the helper call above, we need to have a getDynamicDocxTemplate helper defined, its implementation can look like this:
const jsreport = require('jsreport-proxy')

async function getDynamicDocxTemplate () {
    // in this case we just get the docx template from the assets,
    // but you can easily get your desired docx template from a fs read or a http request call, etc
    const assetFound = await jsreport.documentStore.collection('assets').findOne({
        name: 'template.docx'
    })

    if (!assetFound) {
        throw new Error('docx asset not found')
    }

    const docxBuf = assetFound.content

    return {
        content: docxBuf.toString('base64'),
        encoding: 'base64'
    }
}
docxHtml
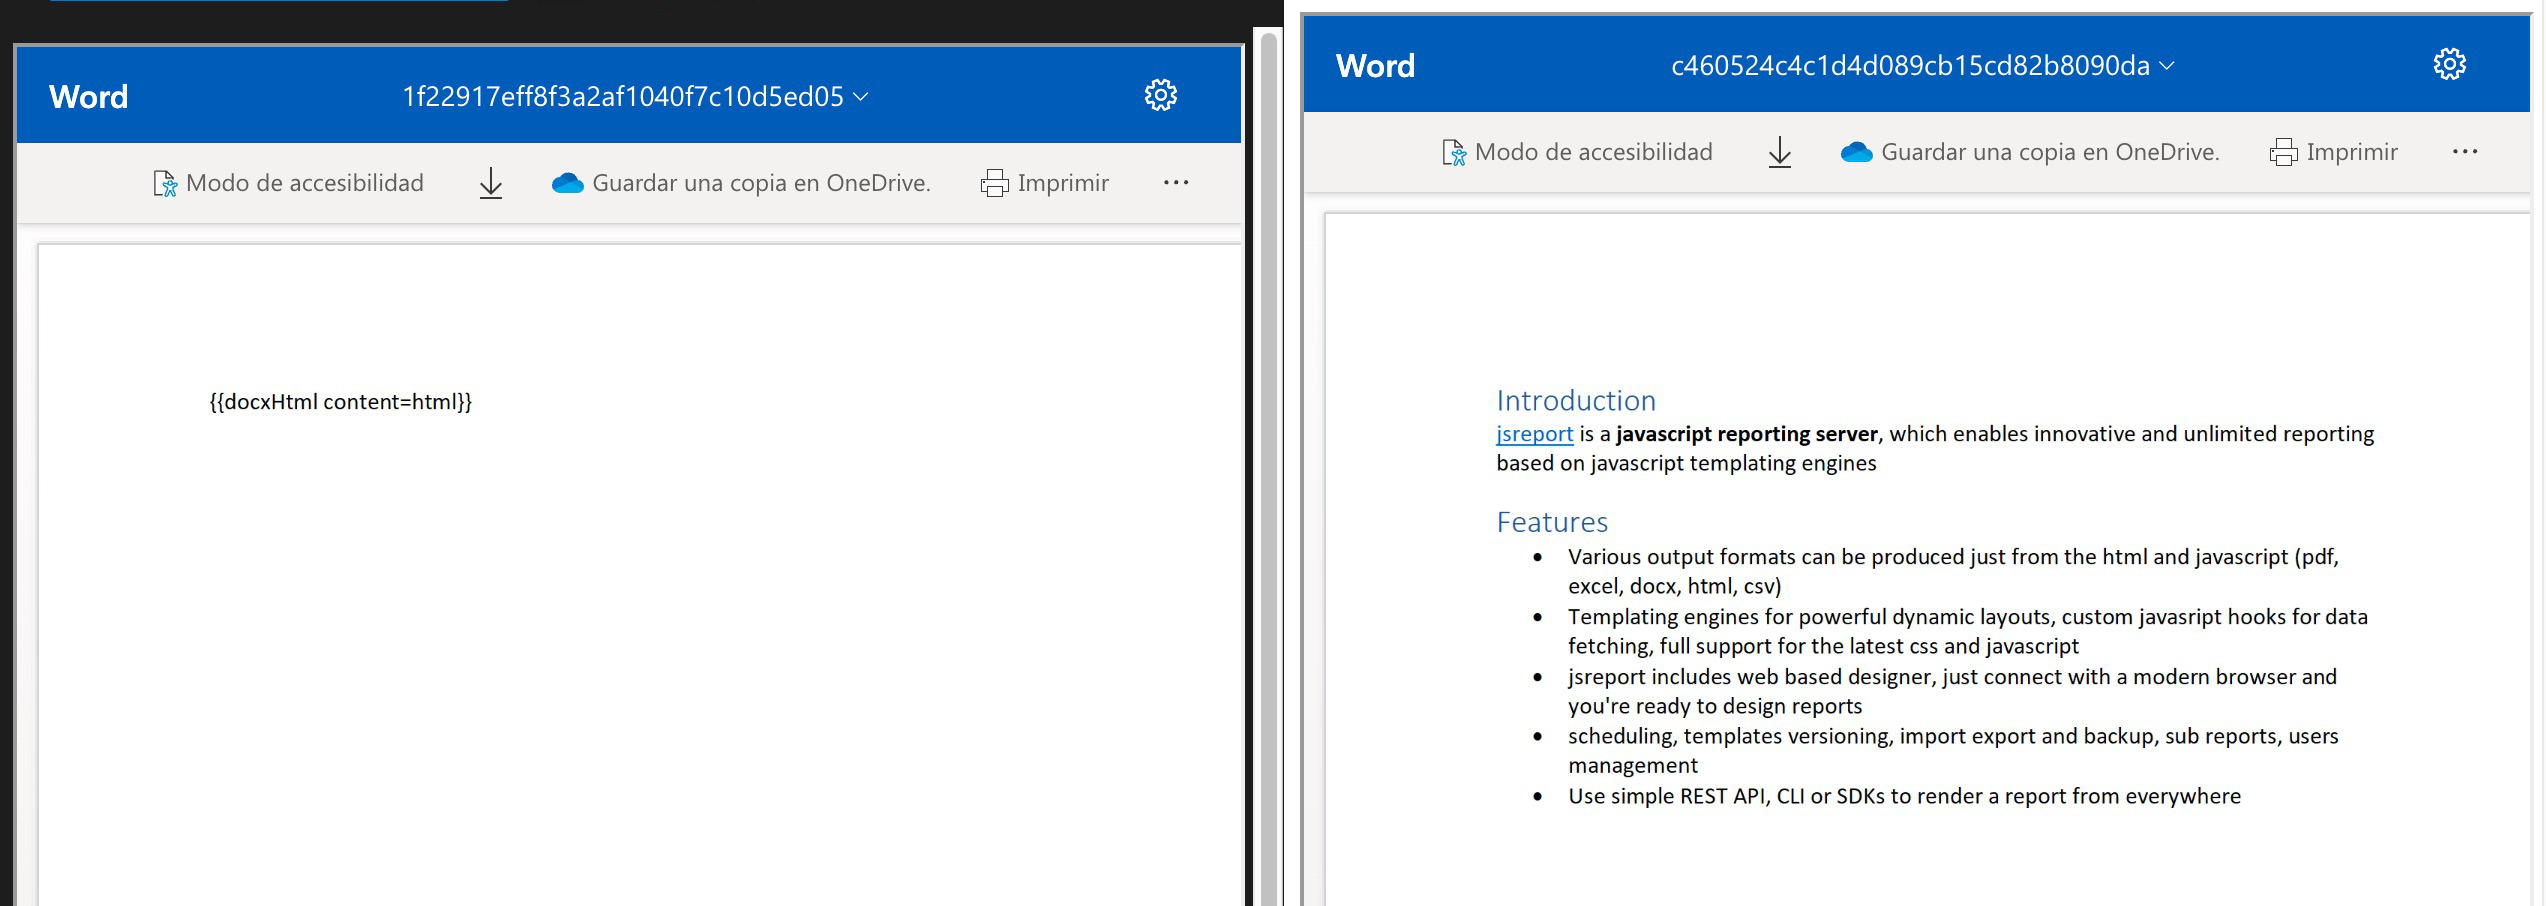
Allows embedding html into docx by converting html tags (<p>, <ul>, <a>, etc) and styles into docx elements (paragraphs, lists, hyperlinks, etc).
The main idea is that you write the helper call {{docxHtml content=...}} in a paragraph of your docx document, this text then will be processed and converted into docx elements based on the tags and styles evaluated in the html.
For example a document with data
{
    "html": "<h1>Introduction</h1><p><a href=\"https://jsreport.net/\">jsreport</a> is a <b>javascript reporting server</b>, which enables innovative and unlimited reporting based on javascript templating engines</p><h1>Features</h1><ul><li>Various output formats can be produced just from the html and javascript (pdf, excel, docx, html, csv)</li><li>Templating engines for powerful dynamic layouts, custom javascript hooks for data fetching, full support for the latest css and javascript</li><li>jsreport includes web based designer, just connect with a modern browser and you're ready to design reports</li><li>scheduling, templates versioning, import export and backup, sub reports, users management</li><li>Use simple REST API, CLI or SDKs to render a report from everywhere</li><ul>"
}
will produce the following document:
There are two modes (inline, block) in which the docxHtml helper can be used, and you will use one or the other depending on your use case
docxHtml block mode
{{docxHtml content=html}}
this is the default mode, it will look for the first helper call in the paragraph (in case there are other docxHtml calls in same paragraph), and replace the whole paragraph with the content generated with the html, which can include creating even more paragraphs. Use of this mode is recommended when you want to produce chunks of content directly from html, multiple sections with styles, or even produce the content of a whole document directly from html.
docxHtml inline mode
jsreport is a {{docxHtml content=html inline=true}}
In this mode the content of the paragraph that contains the helper call will be preserved, the html will be processed in a way that will only produce text and styles that only affects text. Use of this mode is recommended when you want to replace only specific part of a existing paragraph in the document, or when you want that the html input does not affect the structure of the existing paragraph.
docxHtml supported tags
The following tags are supported, tags that are not part of this list are just considered unsupported and therefore treated as <span> elements:
<p>,<div>(to produce paragraphs)<span>and text (to produce text)<b>,<strong>(to produce text with bold style)<i>,<em>(to produce text with italic style)<u>,<ins>(to produce text with underline style)<small>,<sub>(to produce text with subscript style)<sup>(to produce text with superscript style)<s>,<del>(to produce text with strikethrough style)<code>(to produce text with background/highlight style)<pre>(to produce text with Courier font and retaining white space in its content)<h1>to<h6>(to produce paragraphs with heading styles)<ul>,<ol>,<li>(to produce lists)- the
startattribute for<ol>lists, it specifies from which number the list should start
- the
<br />(to produce line breaks)<a>(to produce hyperlinks)<img>(to produce images)- the
srcattribute can target an asset or image from a remote url - if
widthorheightattributes or styles attributes are not set, the dimensions of the specified image will be used - the
widthattribute or style attribute specifies the width of the image, value can be inpxorcm. when only width is set, the height will be automatically generated based on the aspect ratio of the image. - the
heightattribute or style attribute specifies the height of the image, value can be inpxorcm. when only height is set, the width will be automatically generated based on the aspect ratio of the image.
- the
<table>,<thead>,<tbody>,<tfoot>,<tr>,<td>,<th>(to produce tables)- the
widthattribute or style attribute ontabletag can be used to specify the width of the table, value can be inpxorcm,% - the
colspanattribute ontd,thtags can be used to produce merged cells horizontally - the
rowspanattribute ontd,thtags can be used to produce merged cells vertically - the
widthattribute or style attribute ontd,thtags can be used to specify the width of the cell, value can be inpxorcm,% - the
heightattribute or style attribute ontr,td,thtags can be used to specify the height of the cell, value can be inpxorcm
- the
docxHtml supported styles
For the moment only inline styles are supported (styles applied directly to html tags like <span style="font-size: 30px">text</span>).
The following styles properties are supported:
font-size(in px, pt, em, rem, %)font-familycolor(names and rgb colors, hex, color names, hsl, hsv)background-color(names and rgb colors, hex, color names, hsl, hsv)text-decoration(underline, line-through)text-align(justify, left, right, center)vertical-align(top, middle, bottom for<td>tags)border(for<table>,<colgroup>,<col>,<td>,<th>tags)padding(left, right, top, bottom, and shorthand)margin(left, right, top, bottom, and shorthand)break-before:page(to produce page break before content)break-after:page(to produce page break after content)width, min-width(for<img>,<colgroup>,<col>,<td>,<th>tags)height(for<img>,<tr>,<td>,<th>tags)
Loading images from html using a custom loader
You can pass pass extra option to docxHtml to specify how do you want images found in the html to be fetched. This will allow to have more control about how an image is downloaded, letting implement custom logic to load images. Ex: {{docxHtml content=html imageLoader=(imageLoader)}}
The imageLoader expects to receive a function which will run when the time to fetch the image comes.
The loader function should return an object with the information of the image. it should have a type (to indicate if the image is png, jpg, etc) and a stream (a readable stream that represents the content of the image).
A basic helper for the imageLoader option will look like this:
function imageLoader() {
    // a loader should always return a stream and type (extension or content type for image)
    return async function loader (src) {
        // you will receive the src of the image as the input of the loader, you can use this value
        // to fetch your image using custom logic
        const fs = require('fs')

        // the idea here is that user can load the image from anywhere, user can use
        // a custom http request library, load from fs or from S3, etc. the user is also
        // in control of the input, you can pass to the helper a path to a local file if it is
        // what the loader needs for its logic.
        // the idea of allowing this is that user can still benefit from our
        // parallel limits and logic of batching images on disk to prevent
        // loading all images on memory and failing to render when using a lot of images
        return new Promise((resolve) => resolve({
            type: '${format}',
            stream: fs.createReadStream(src)
        }))
    }
}
docxChart
Create a chart inside the desktop word application and use docxChart helper call inside the chart title.
The helper call in a title can look like this:
A title{{docxChart data=fruits}}
With the following data on the input:
{
    "fruits": {
        "labels": ["Q1", "Q2", "Q3", "Q4"],
        "datasets": [{
            "label": "Apples",
            "data": [100,50,10,70]
        }, {
            "label": "Oranges",
            "data": [20,30,20,40]
        }]
    }
}
The data.labels describes labels on the X axis. The data.datasets includes values for the Y axis.
Each dataset need to contain a label, and the data associated with it, additionally (only for scatterChart type) it can also define some labels for each specific unit of data (dataLabels)
{
    "fruits": {
        "labels": ["Q1", "Q2", "Q3", "Q4"],
        "datasets": [{
            "label": "Apples",
            "data": [100,50,10,70],
            "dataLabels": [
                "Full",
                "Medium",
                "Low",
                {
                    "value": "Medium",
                    // possible values are: "left", "right", "center", "top", "bottom"
                    "position": "left"
                }
            ]
        }, {
            "label": "Oranges",
            "data": [20,30,20,40]
        }]
    }
}
You can also pass some options to the chart that control the way the chart display, limit the information.
{{docxChart data=fruits options=options}}
the supported options are:
- scales (
object) -> Options to control the display of the chart axis- scales.xAxes (
array) -> Options to control the display of the x axes - scales.yAxes (
array) -> Options to control the display of the y axes Axis options- display (
boolean) -> whether to show or hide the axis - ticks.stepSize (
number) -> the step size to use to separate the axis's ticks - ticks.min (
number) -> the min value to show in the axis's ticks - ticks.max (
number) -> the max value to show in the axis's ticks
- display (
- scales.xAxes (
// example options
{
    "scales": {
        "xAxes": [{
              "display": true,
              "ticks": {
                  "stepSize": 2,
                  "min": 1,
                  "max": 15
              }
        }]
    }
}
docxWatermark
Create a watermark inside the desktop word application and use docxWatermark helper call inside the watermark text input. the helper is only needed when you want to configure options on the watermark with your logic, if you just want to modify the text and re-use the options you already applied to the word application then just use standard handlebars syntax.
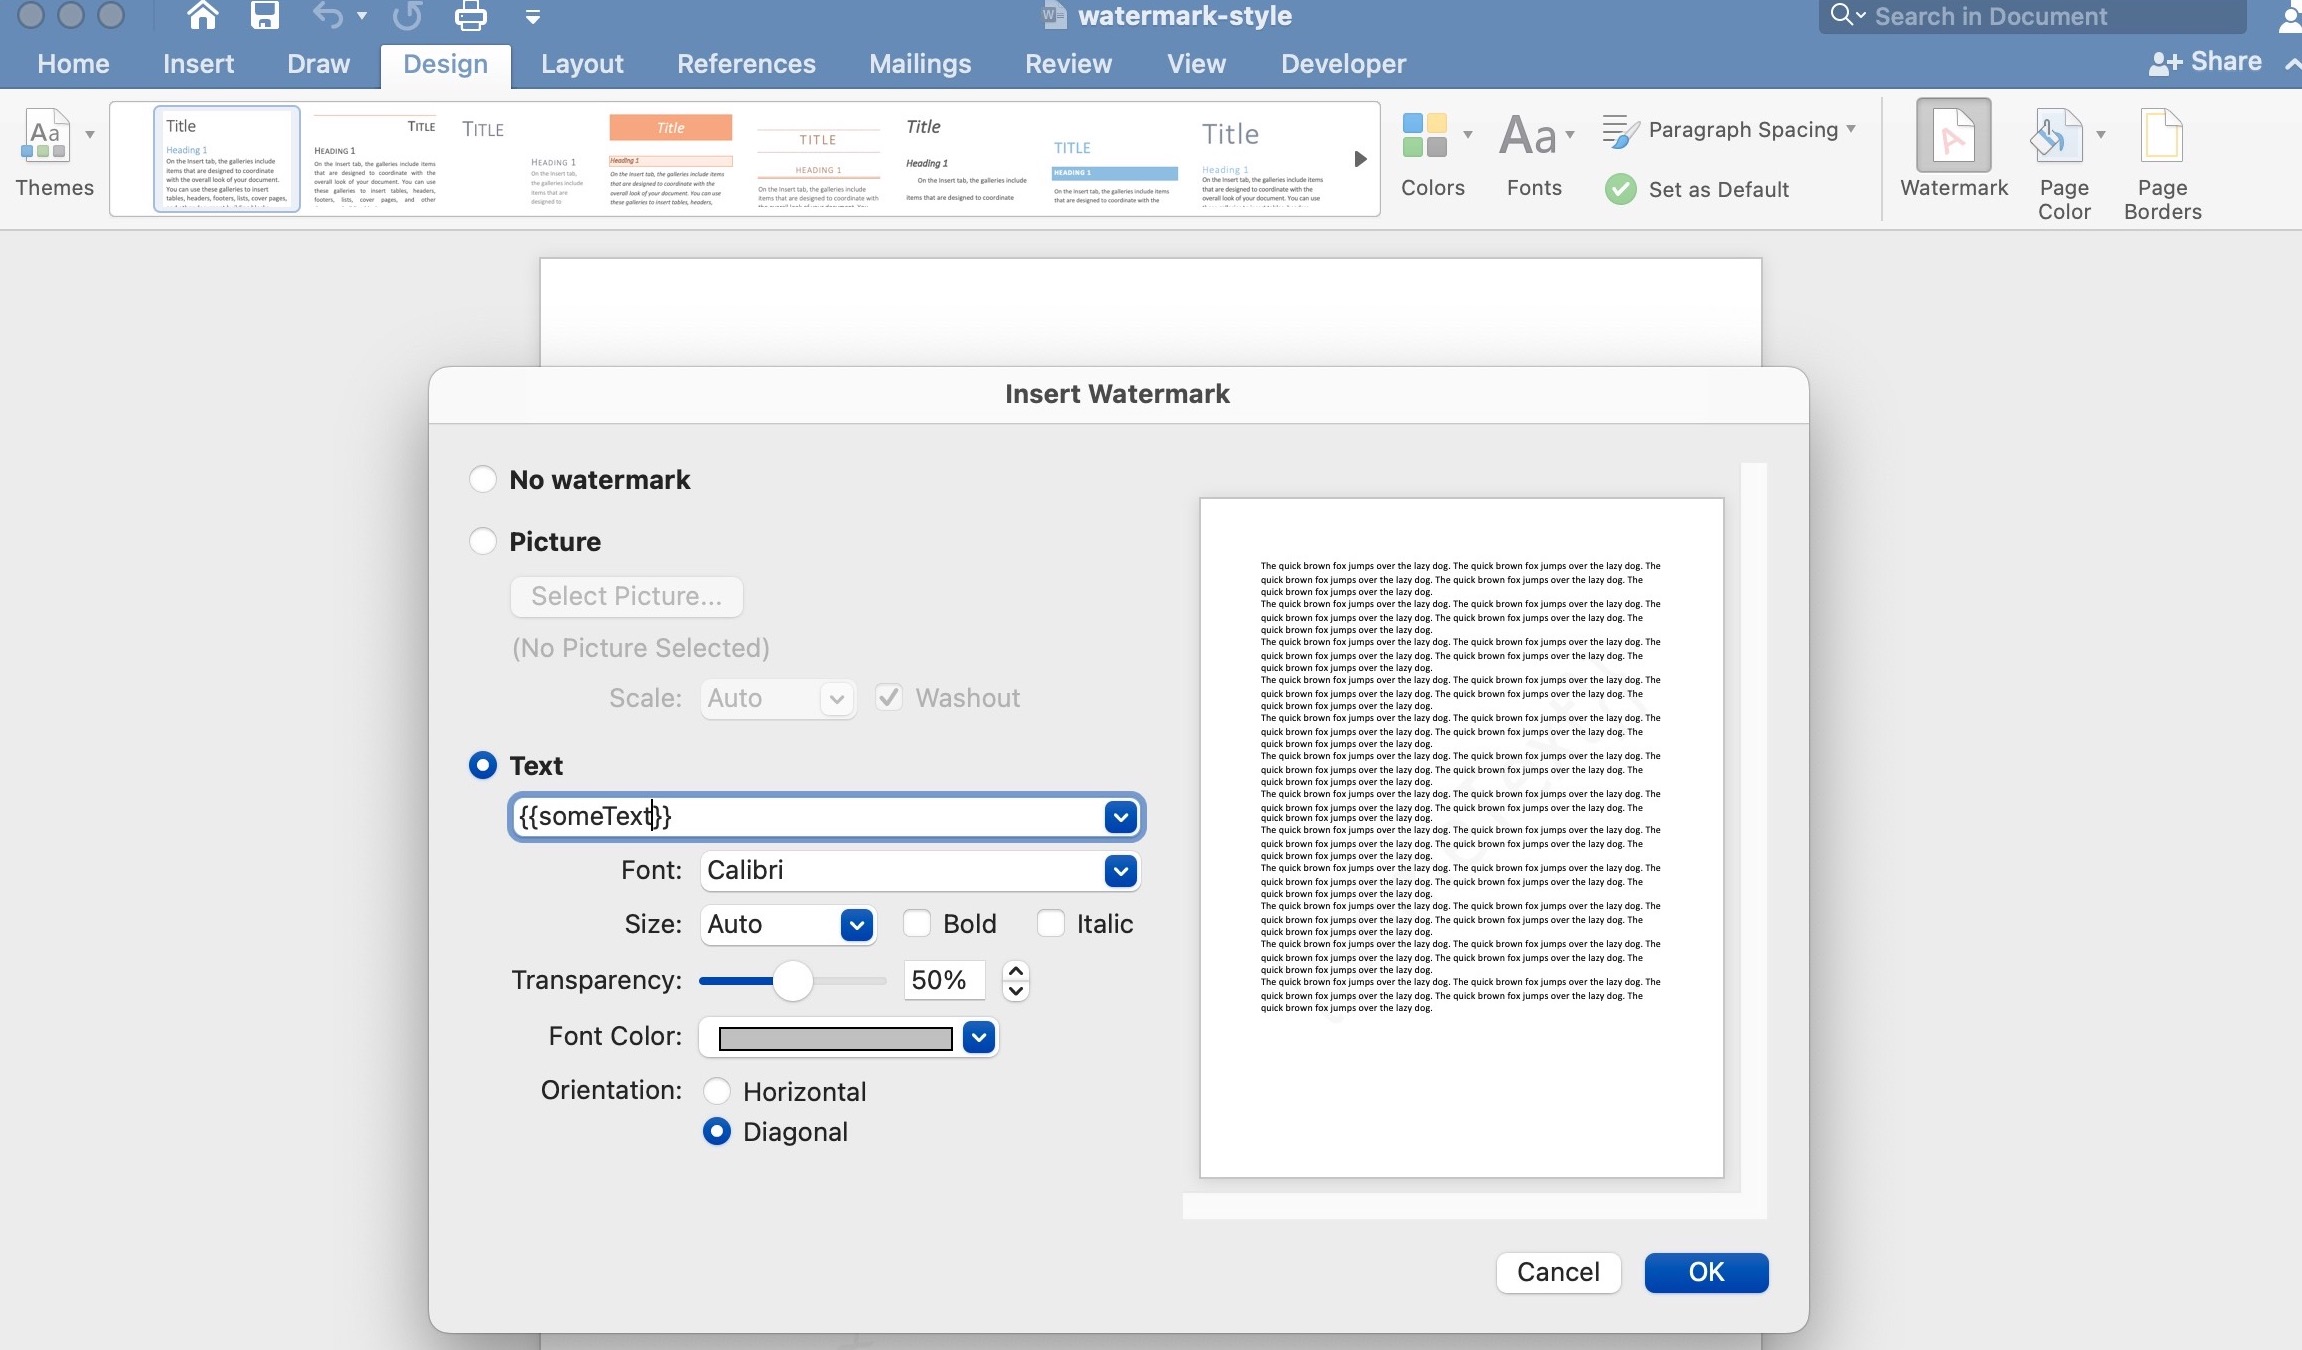
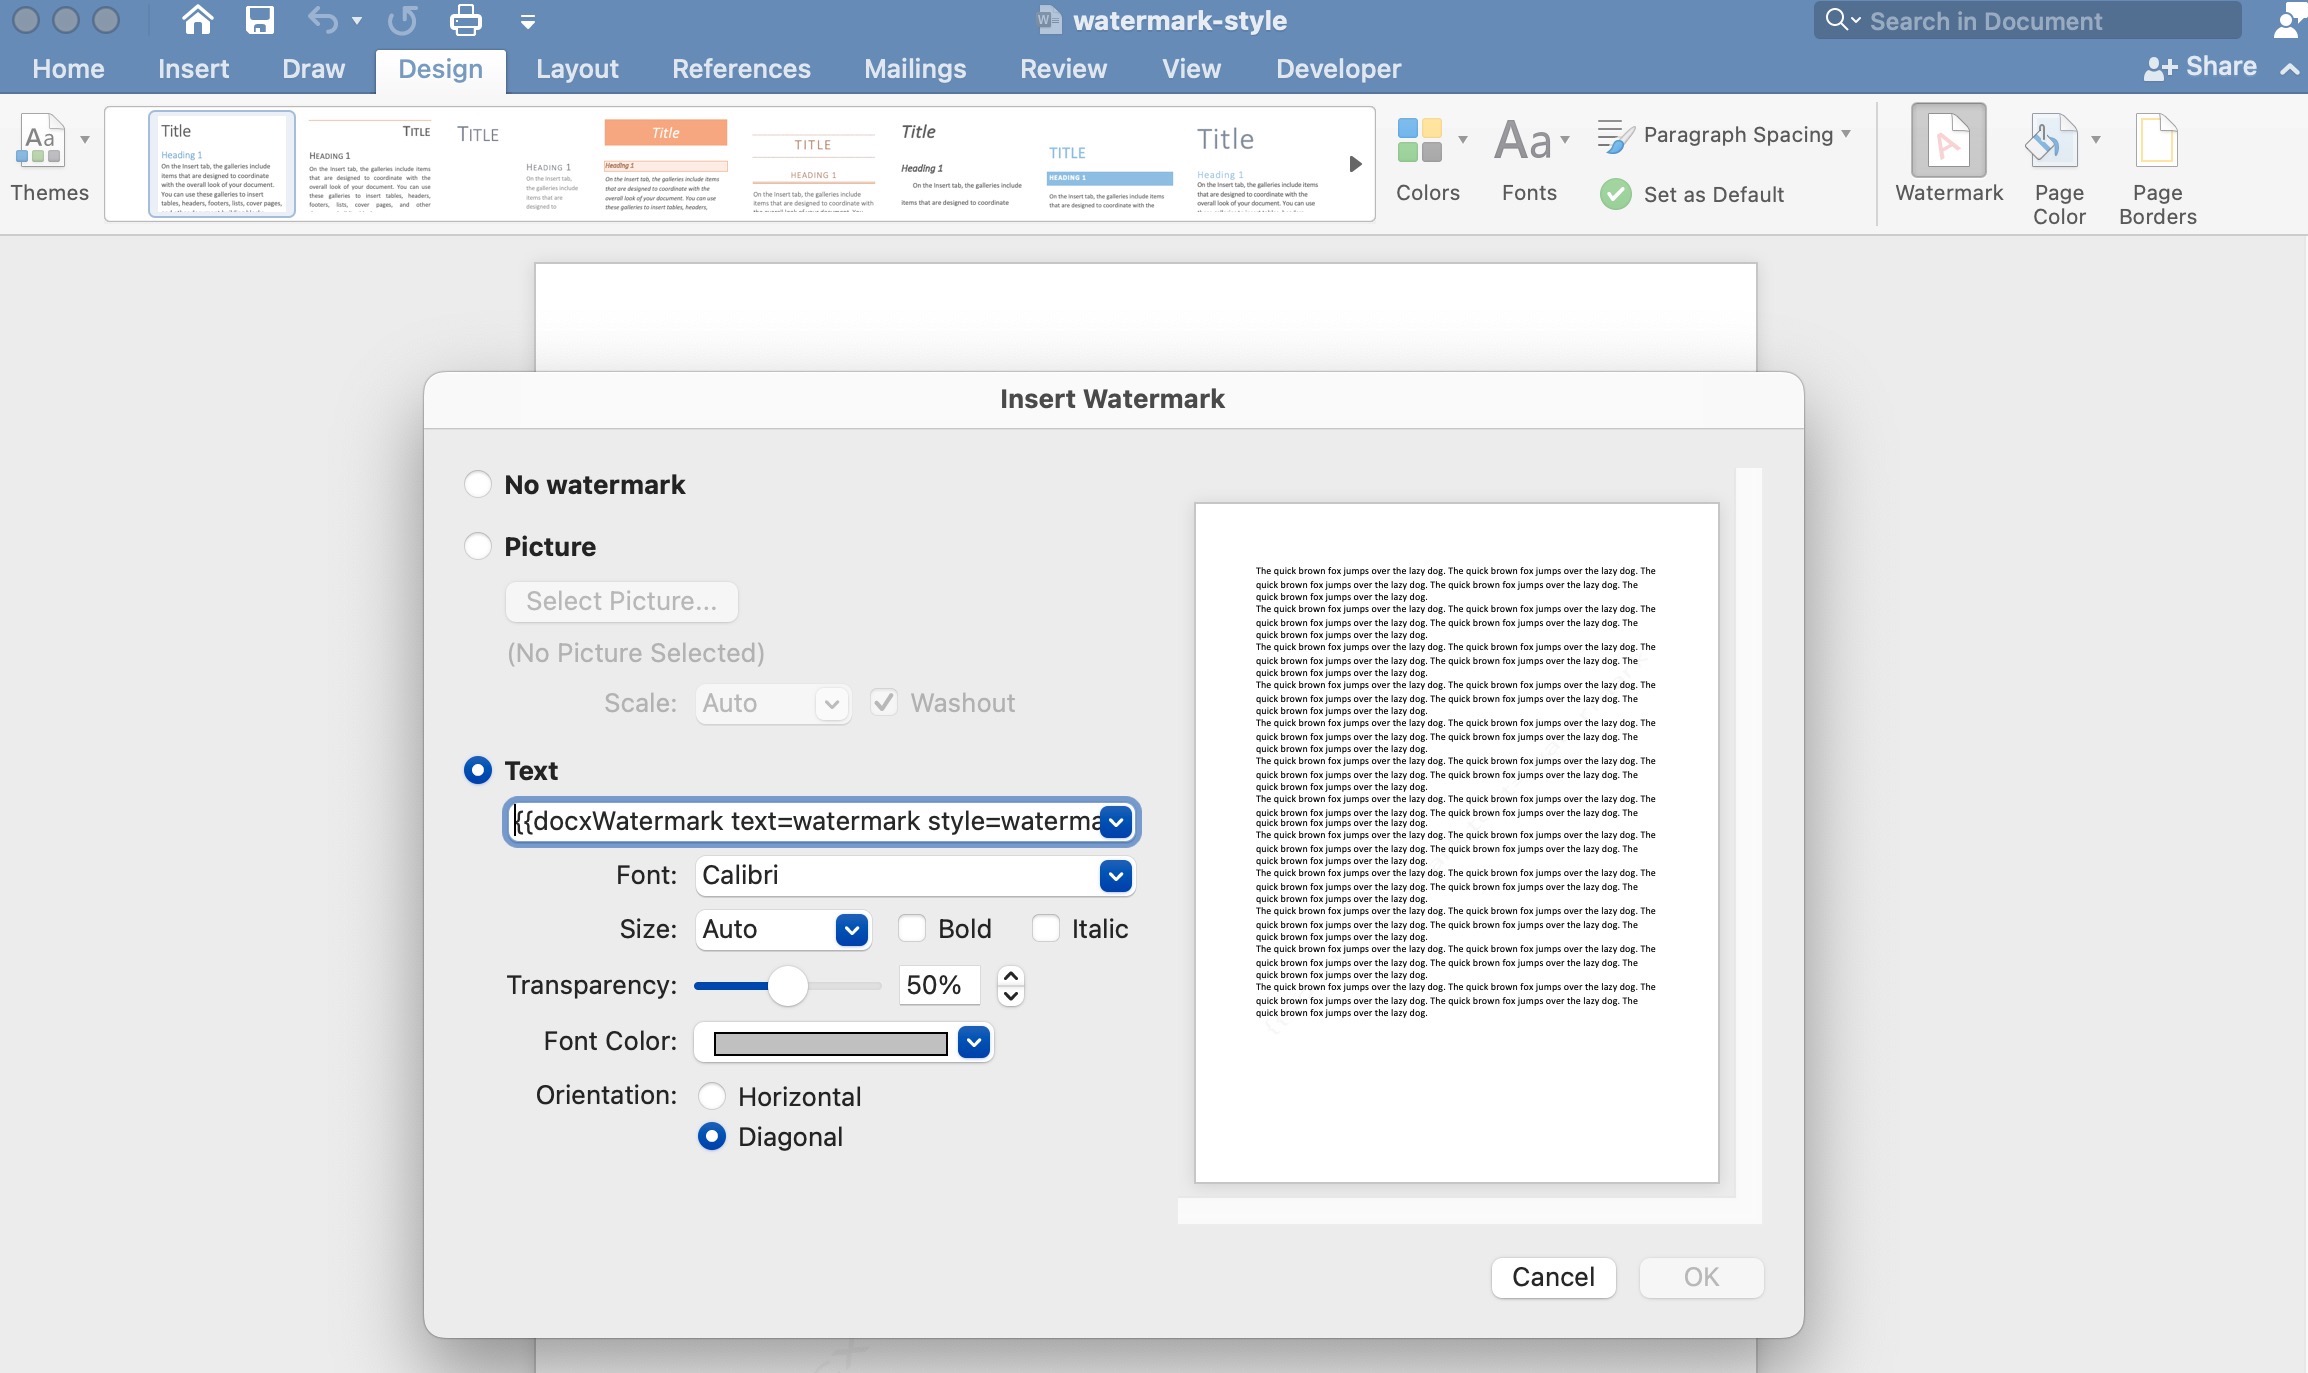
The helper call in the text input can look like this:
{{docxWatermark text=watermark style=watermarkStyle}}
With the following data on the input:
{
    "watermark": "CLASSIFIED",
    "watermarkStyle": {
        "fontFamily": 'Times New Roman',
        "fontColor": '#c45911',
        "fontSize": 66,
        "fontBold": true
    }
}
The parameters that docxWatermark helper supports are the following:
- text (
string) required -> the text to display in the watermark - enabled (
boolean) -> whether to display the watermark or not, it istrueby default - style (
object) -> options to control the styles on the watermark- fontFamily (
string) -> the font family to use for the text shown. Example:Times New Roman - fontColor (
string) -> the color to use for the text shown. it can be any css hex color, it also support color names but for better compatibility use hex. Example:#c45911 - fontSize (
number) -> the font size in number of points. Example:66 - fontBold (
boolean) -> whether to use bold in text or not - fontItalic (
boolean) -> whether to use italic in text or not - transparency (
string) -> the percentage of transparency to use for the text, it can be anything between 0% and 100%. Example:65% - orientation (
string) -> the orientation to use for the text, it can behorizontalordiagonal. Example:diagonal
- fontFamily (
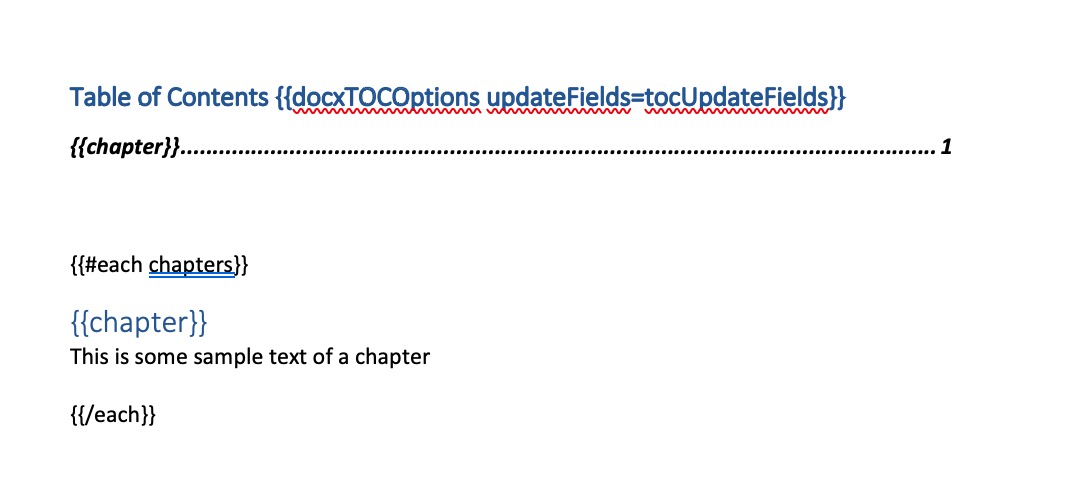
Automatic sync of Table of Contents
A docx document requires to always refresh the TOC to keep it in sync with the content/titles of the document. This presents an issue when you generate the content/titles of the document dynamically, because when you open the docx file you will noticed that the generated TOC is out of sync with what the document contains. To help with this we automatically update the TOC when producing the docx file, we do our best to produce the same result as you would get by refreshing manually just keep in mind that even if the styles don't match the TOC at least should have the same items/titles as the document. Page numbers in the TOC is something that we can not sync automatically, so by default when we detect there is TOC in the document we add a setting in the file that makes MS Word prompt and ask if you want to sync the TOC (fields, and page numbers) when you open the document for the first time. In case you find such prompt to be annoying then you can avoid such setting to be adding by using the docxTOCOptions helper with updateFields param in the TOC heading, you can pass false to this param to avoid the prompt.
Forms
The form elements like checkboxes and inputs can be placed to the word file from the Developers tab. This tab is by default hidden so you need to enable it using:
File tab, go to Options > Customize Ribbon Under Customize the Ribbon and under Main Tabs, select the Developer checkbox.
Text input
No need to use a special helper. Just add a text box and use handlebars syntax inside to fill a dynamic value.
Checkbox
Add checkbox control from the Developer tab, select Properties and use docxCheckbox helper call in the title. The only supported param is value which expects bool to toggle the checkbox.
{{docxCheckbox value=ready}}
Combobox
Add combobox control from the Developer tab, select Properties and use docxCombobox helper call in the title.
{{docxCombobox value=val}}
In case your items are static, you can prepare them upfront in the "Drop-Down List Properties" and use just a single parameter value to preselect desired items.
In case your items are dynamic, you can bind them using items parameter. This parameter expects the following array:
[ { value: "a", text: "Some text to select" } ...]
{{docxCombobox value=val items=items}}
docxPageBreak
Add a forced page break to the document.
{{docxPageBreak}}
docxRaw
Allows to insert raw xml into the document, replacing some parent xml element. Intended to be used for advanced users which know how to manipulate the raw xml representation of a docx file
{{docxRaw xml="<w:r><w:t>raw xml run</w:t></w:r>" replaceParentElement="w:r"}}
docxRemove
Allows to conditionally remove some content from the document. if the value of the v attribute evaluates to true the target content (determined by the t attribute) inside the helper call will be removed from the document.
{{docxRemove v=shouldRemove t="paragraph"}}
the values for the target attribute t are: paragraph, row, table, if not specified the default value for t is paragraph.
Custom helpers
You can implement also your own custom helpers and use them in the word templates. The helpers section can be toggled in the studio using the "show helpers" button.
Child templates
The recipe doesn't support using child templates or assets to insert another docx file into one template. Both can be used just to insert text.
Development
Repetitive uploading of the docx template can get easily tedious. Fortunately, you can use the fs store external editor editing feature with docx as with any other file. The first you need to change the configuration to enable automatic files reload on external changes.
"extensions": {
  "fs-store": {
    "externalModificationsSync": true
    }
  }
}
Afterward, make sure you have ready a template with docx recipe and associated docx template in the studio. Then open a word application (the best is on the second screen) and find file data/adocxtemplate/content.docx representing your associated template. Now, editing and saving this file in word app cause automatic reload of the template in the studio and re-render so you see immediately the reflected changes.
Preview in studio
See general documentation for office preview in studio here.
API
{
  "template": {
    "recipe": "docx",
    "engine": "handlebars",
    "docx": {
       "templateAssetShortid": "xxxx"
    }
  },
  "data": {}
}
In case you don't have the office template stored as an asset you can send it directly in the API call.
{
  "template": {
    "recipe": "docx",
    "engine": "handlebars",
    "docx": {
       "templateAsset": {
          "content": "base64 encoded word file",
          "encoding": "base64"
       }
    }
  },
  "data": {}
}